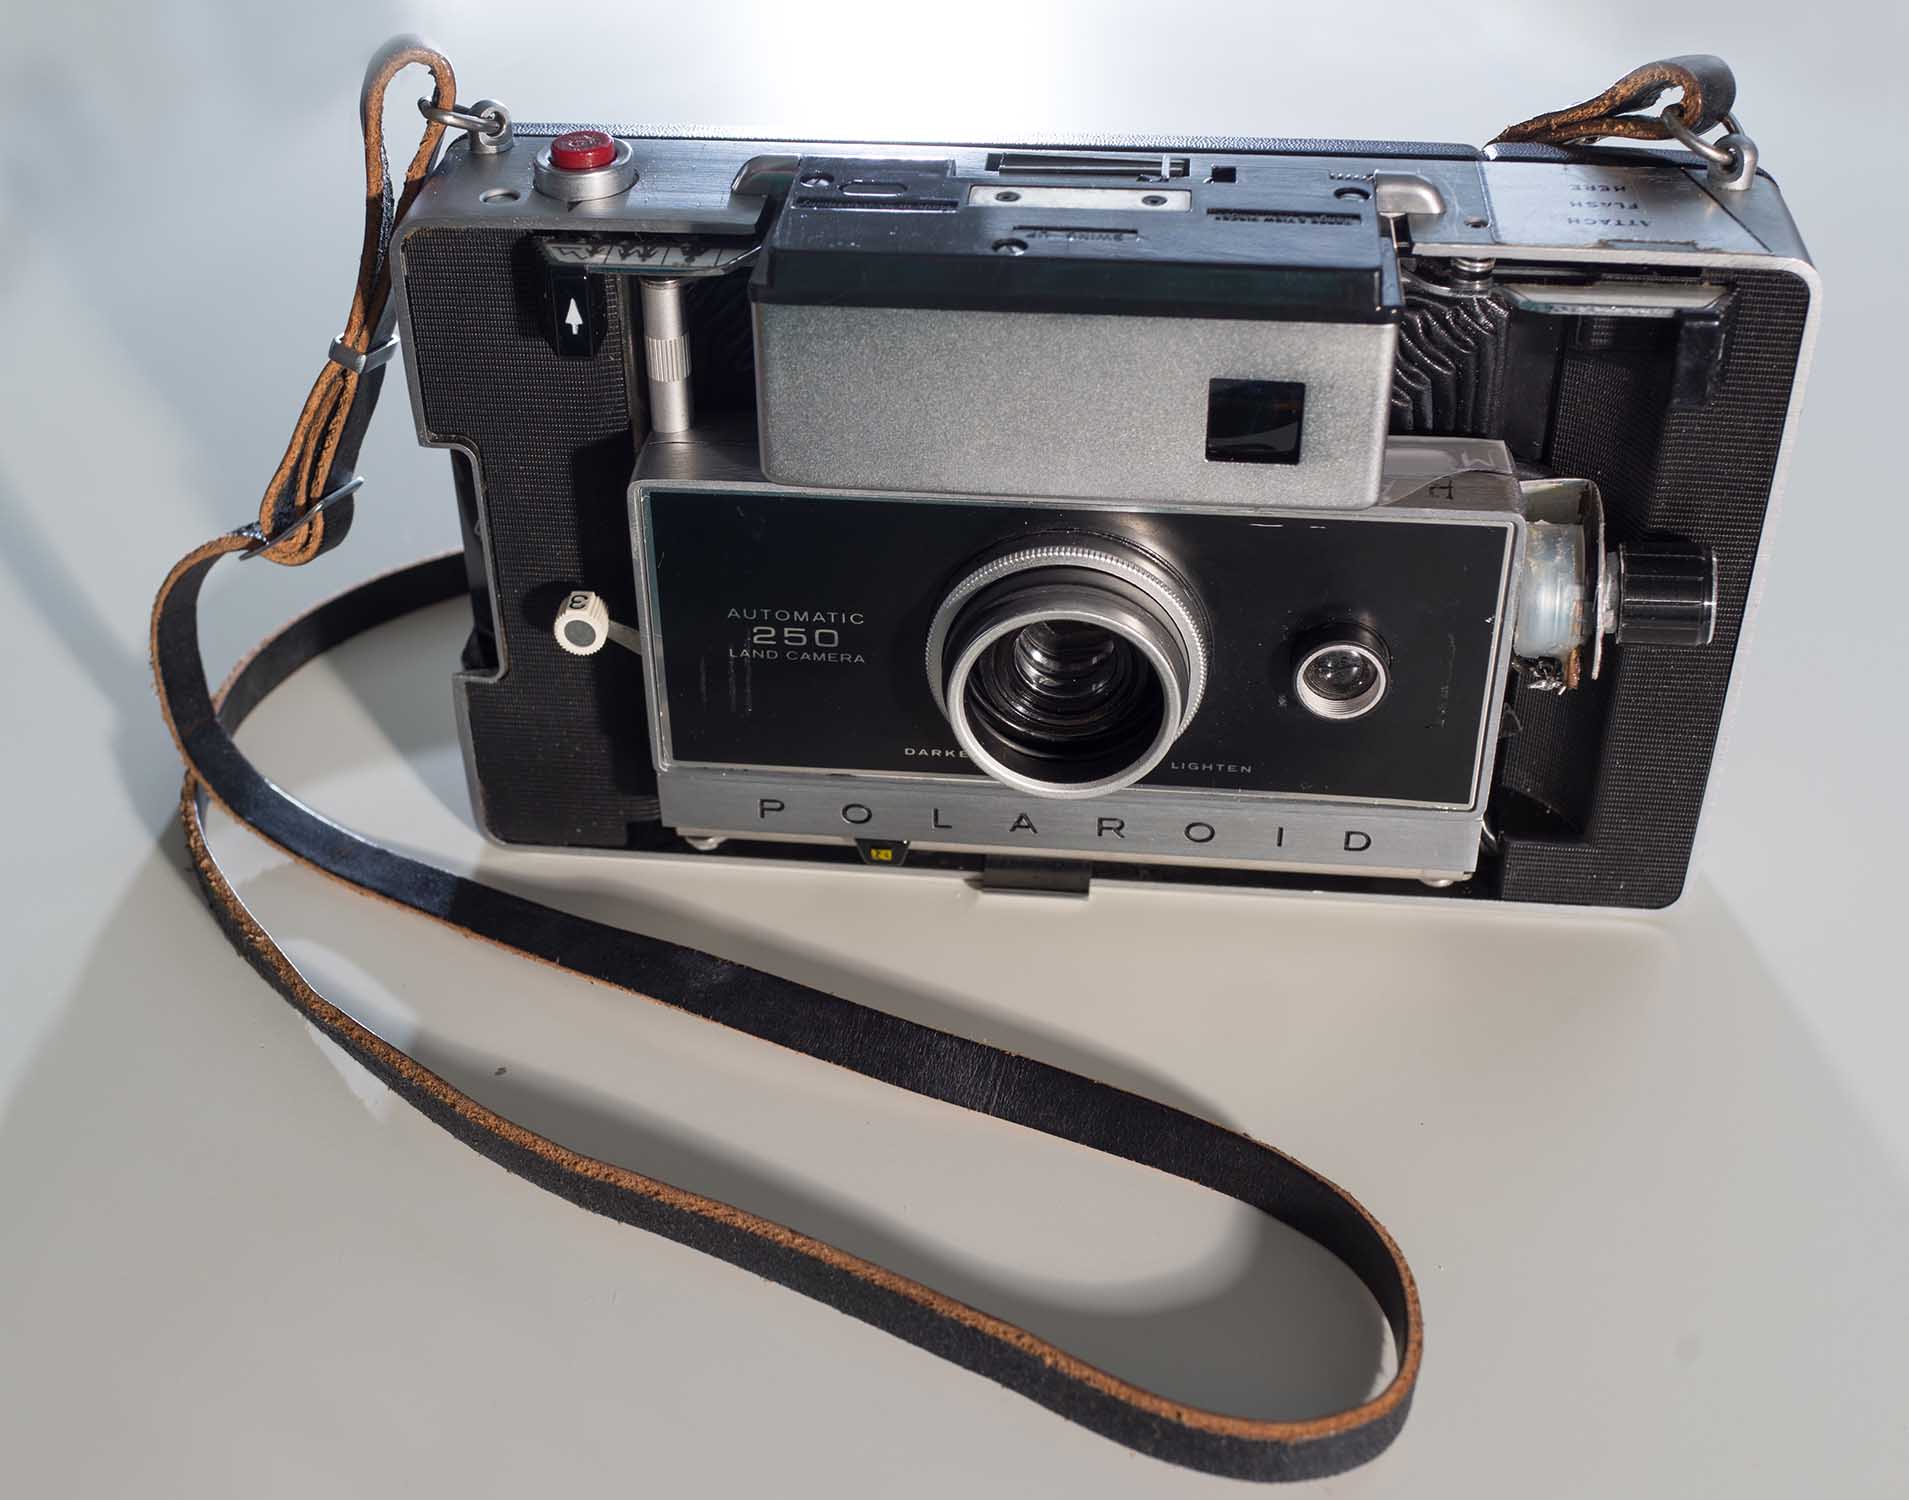
Converting a Polaroid 250 Land Camera to Polaroid 180


Conversion Premise
Background
The Polaroid Land Cameras are a family of instant film cameras manufactured by Polaroid from around 1947 to 1983 based on the original designs of Edwin Land. The most famous of these cameras are probably the SX-70 family and its successors in the form of the OneStep and others. Their influence extended into the original Instagram logo design (based on the OneStep) and even into the 2000's where these were popular camera since film and instant film were superior or cheaper to many digital cameras.
Quality
There are three general types of these traditionally thought-of Polaroid cameras. The cheapest, such as the 104, have plastic bodies and lenses, and only a rough guess focusing system resulting in very poor images. The middle ground, such as the 250/360, which have stainless steel bodies, glass lenses and good rangefinders, resulting in fair images. But among the most prized of the Polaroid Land Cameras are the Polaroid 180 and Polaroid 195, due to their good quality lenses and manual shooting allowing the user to produce sharp, well exposed images. These are by far the most expensive models to purchase now due to their relative quality and rarity. They can fetch upwards of $300. This price is no issue for a Polaroid enthusiast, but for someone who cares about image quality more than nostalgia or trend, even the best quality image from these rather cheaply made consumer cameras does not warrant the price tag of a Model 180. These are just fun toys, so to improve the image quality while shooting, manual control was really the only choice.
Many photographers prefer this control with such instant film cameras since the so-called "electronic eye" used for automatic exposure in other land cameras was rather poor, and the other exposure controls were rather crude. Thus the clear solution was to develop electronic manual control.
Polaroid 250 Controls
Unlike today's metering systems, the "electronic eye" averaged the light in the whole frame by use of a separate lens and a single photoresistor. Settings were available for use with the four types of films; 75 ASA, 150 ASA, 300 ASA and 3000 ASA. A rotary selection dial moved different sized apertures behind the photographic lens to reduce incident light on the film based on the selected speed. This of course affected the depth-of-field and gave no hints as to the shutter speed being used. Another lever was used to select if photos were being taken indoors or out. This moved a physical grating over the photoresistor to reduce the amount of light hitting it, thus changing the shutter speed. There is also a lighten/darken control dial around the lens which moves a gradually thickening piece of translucent dark plastic over the photoresistor. "Lighten" moves the thicker part of the plastic over top of the photoresistor, increasing the compensation for a lower light environment; darken acts in the opposite fashion. This works within a stop or so and is the only real compensation or 'manual control' on the camera. The control over scenes with high contrast or highly radiant areas (sky, light bulbs, etc.) is poor and more often than not results in very badly metered images with blown out highlights, black shadows, and muddled midtones. The 180 is therefor sought out for its superior controls.
Conversion Process


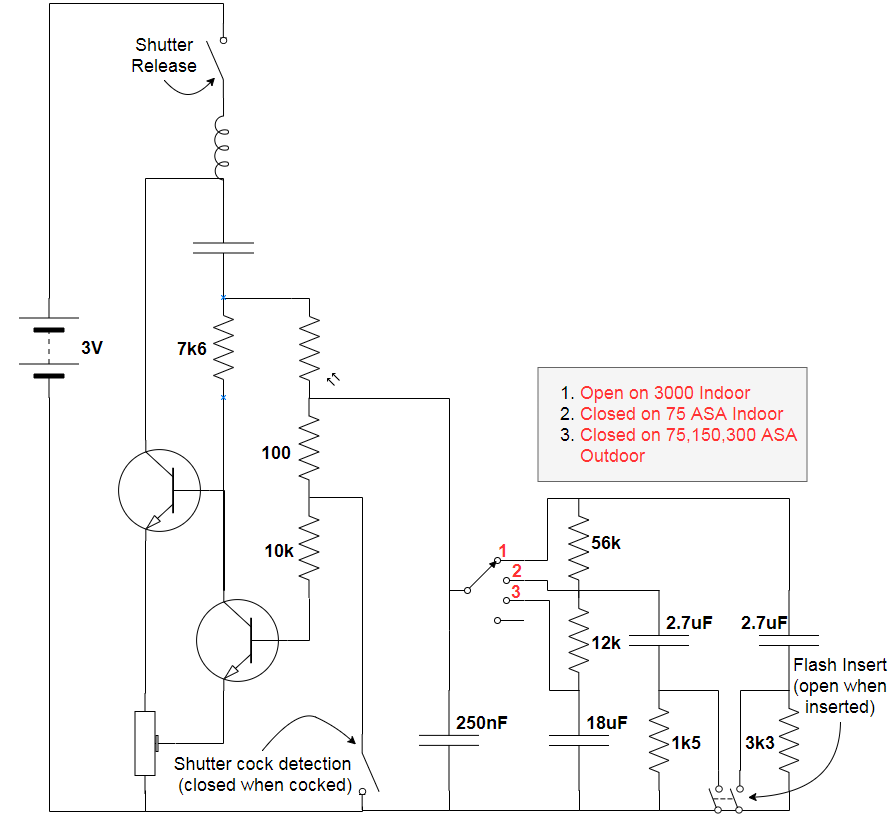
To convert the Model 250 to manual control I determined that I wanted to keep the original automatic functionality, even though it was rather poor. I first mapped the camera circuit to determine how best to solve conversion. Some components may have proved to be unnecessary or replaceable via some smaller components to make physical space in the camera. It turns out that the rather old flexible circuit board is rather difficult to handle since it is essentially just the copper traces sandwiched between two layers of kapton-like tape. The interior of the camera was also mostly taken up by the shutter mechanism. This meant that the remaining space in the front body was taken by the circuit and its support structure. The support needed to stay in order to retain the shutter in the proper position, so without completely replacing the circuit there was really no space to put any components inside the front housing.
The design that I settled on only used two components to augment the functionality of the camera; a switch, and a potentiometer. In the schematic the switch can be used to select the photoresistor or the manual potentiometer as resistance bleeder for the tank circuit. This releases the electromagnet (inductor) current at some point and the shutter is released. In order for the manual potentiometer to work properly, it must handle similarly to the photoresistor. That is, it must adjust its resistance in an exponential fashion if stops are to be used to increment the shutter speed. A log scale potentiometer was used to allow for a usable shutter speed scale.
A visual scale needed to be attached to the potentiometer for shutter speed selection, so testing was done to verify and characterize the shutter speeds. Testing revealed that the log scale was imperfect, likely due to the manufacture of the potentiometer. This was no matter since further testing could simply define the rotary positions for the shutter speeds.
The testing methodology was to simply cock and release the shutter while recording the sound. The sound of the aperture release was loud and distinct while the sound of the shutter slide release was sharp and defined. It was easy to see in each recording where events occurred, and therefore measure the exposure time. After a few dozen trials the dial positions were well understood and a dial plate was designed to fit over it. Testing, especially at the faster shutter speeds was verified with a high speed camera at 1000fps to determine that the actual light path through the lens was only open for the expected amount of time.
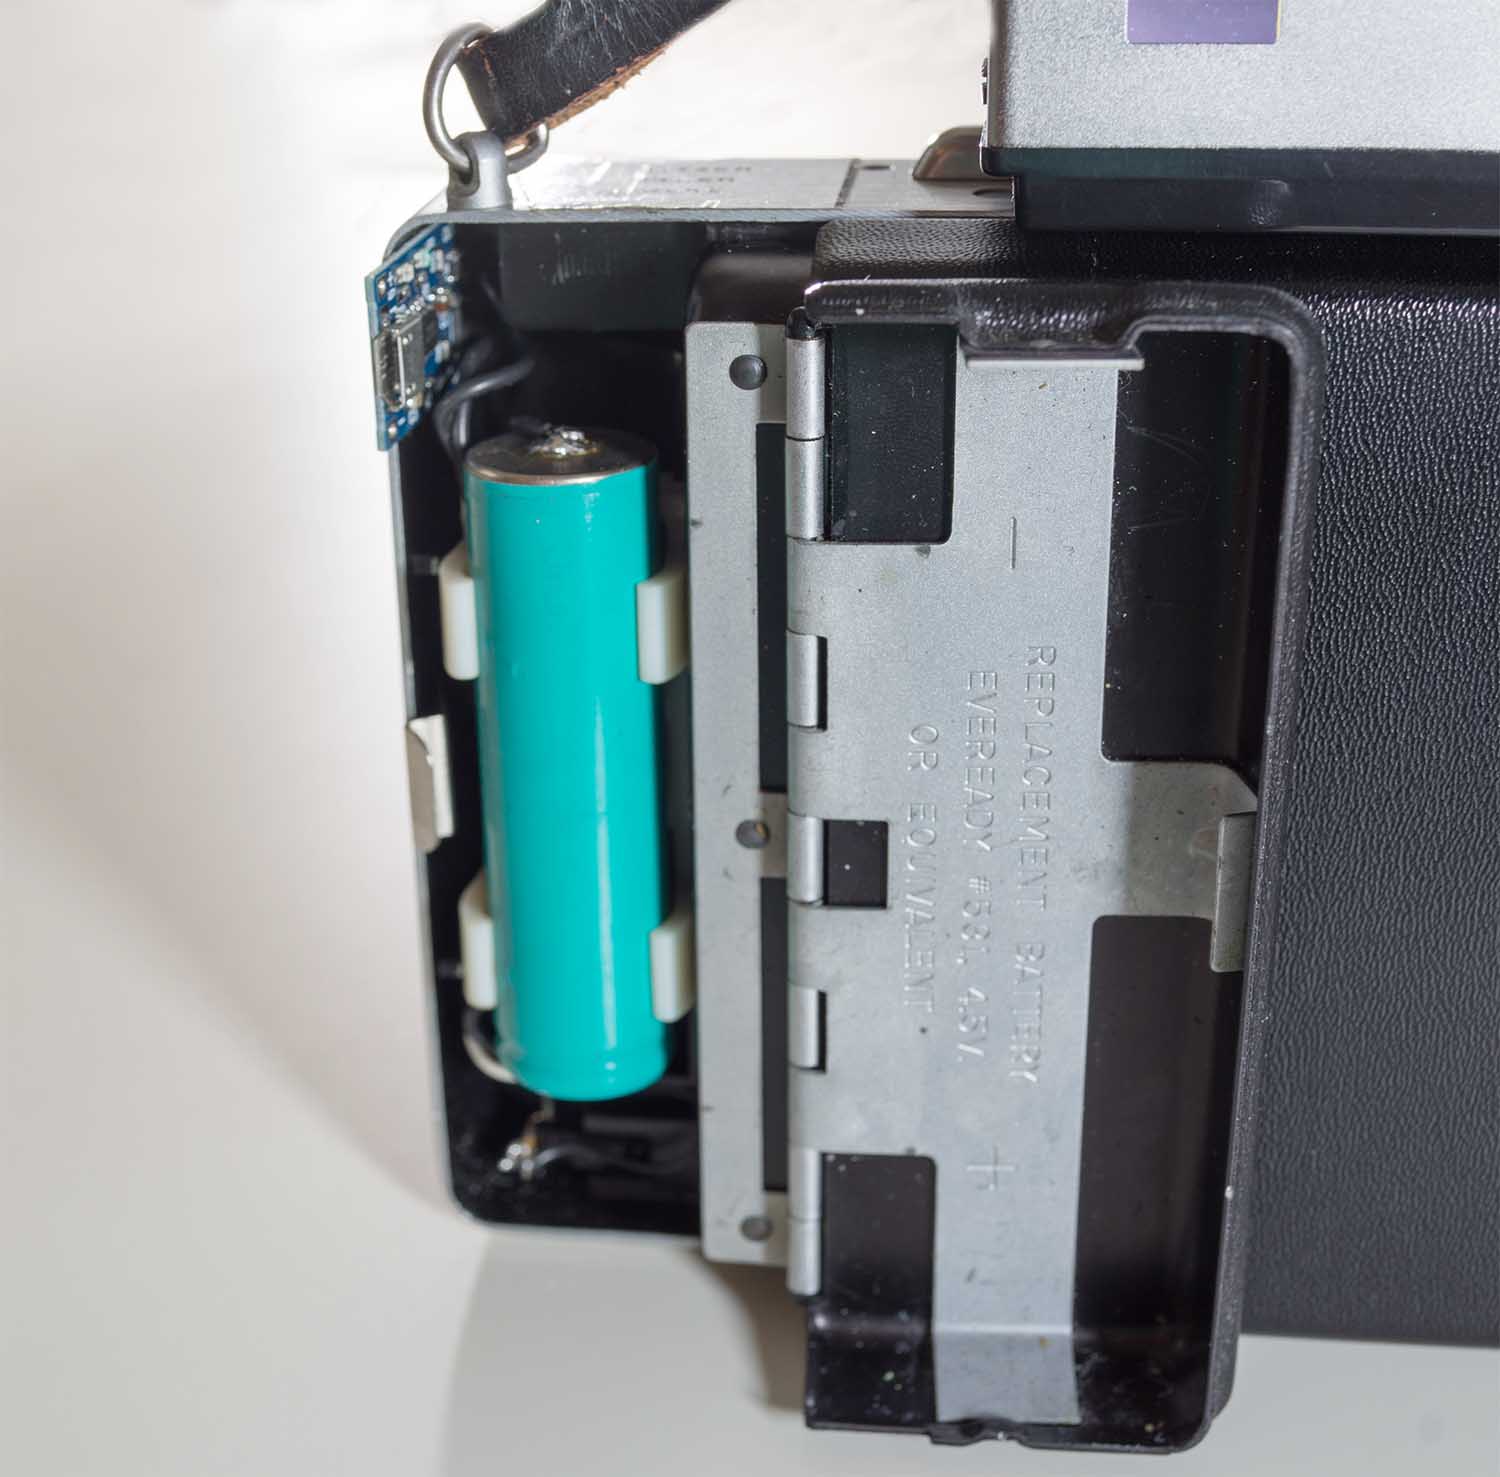
Polaroid Land cameras also accept an unusual battery; #531. A common modification is to replace this battery with a series pack of 3 AAA batteries. Instead of this, I decided to use a 18650 lithium cell since it fit in the stock position and was a good match for the usual 4.5V with its 3.0-4.2V range. This also meant that a simple USB charge controller could be used to manage the cell and make the camera USB rechargeable.


